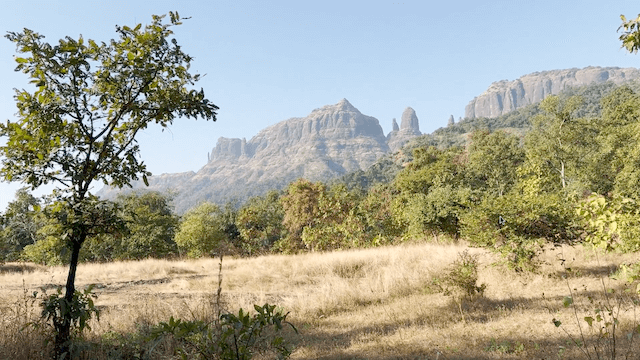
Mahuli Fort is a popular trekking destination in Maharashtra, located near Asangaon, about 95 km from Mumbai. Known as the highest point in Thane district, it stands at an impressive altitude of 2,815 feet above sea level. Surrounded by dense forests and offering panoramic views, Mahuli Fort is a perfect getaway for nature lovers, history buffs, and adventure enthusiasts.
| Trek Name | Mahuli Fort Trek |
| Trek Difficulty | Moderate |
| Highest Altitude | ~2,815 feet (857 meters) |
| Total Trek Distance | ~10 Km (round trip) |
| Trek Route Type | Out and Back Trail |
| Trek Starting Point | Mahuli Village, Asangaon |
| Trek Duration | 1 Day |
| Location | Thane District, Maharashtra, India |
| Best Time to Trek | Monsoon (June-September) and Winter (October-February) |
Mahuli Fort has a rich history dating back to the 15th century. Initially under the Nizam Shahi dynasty, it later became a significant stronghold for the Marathas. The fort’s strategic location made it a battleground for various rulers, including the Mughals and the British. Shivaji Maharaj recaptured the fort multiple times, showcasing its importance in Maratha warfare. Today, the fort stands as a symbol of resilience and offers glimpses into its glorious past through its ruins.
Our Mahuli Fort Trek Journey: Mahuli Fort Detailed Itinerary
We began our journey early in the morning, catching a local train from Ghatkopar to Asangaon. The excitement grew as one of our friends joined us at Thane station, adding to the anticipation of the adventure ahead. Upon reaching Asangaon station, we hopped into an auto-rickshaw to Mahuli Village, which cost us ₹250 per auto.
At the base village, we started our trek preparations with a hearty breakfast of poha and tea, ensuring our energy levels were up. We also filled our water bottles, knowing hydration would be key during the trek.
The trek officially began at the trailhead near a small temple, where we came across the Forest Department’s office. There, we paid an entrance fee of ₹30 per person. Just beyond the gate, a small children’s park greeted us, a charming and unexpected sight that added a cheerful touch to the serene surroundings.
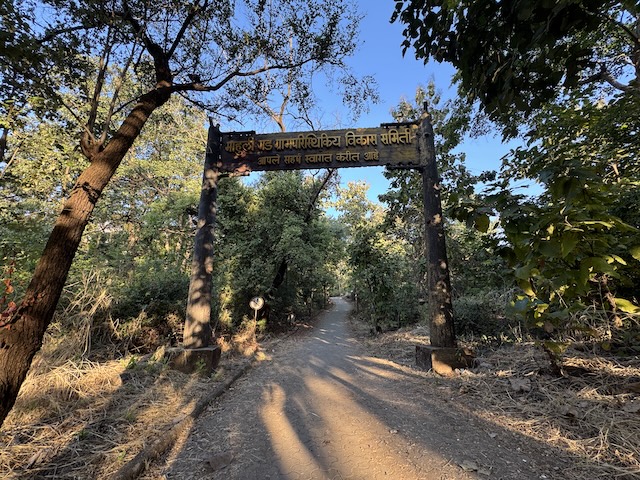
The trail started with a gentle ascent through a dense forest. The soothing sounds of chirping birds and rustling leaves created a peaceful ambiance, making the initial stretch thoroughly enjoyable and setting the perfect tone for the journey ahead.
The newly constructed bridge was our first major landmark. This bridge is particularly useful during the monsoon, as the river beneath tends to swell dangerously. As we crossed it, we noticed clear signboards and white arrow markings guiding us along the route. Shortly after, we reached a fork in the trail. One path led to a seasonal waterfall, dry during our visit, while the main trail continued towards the fort.

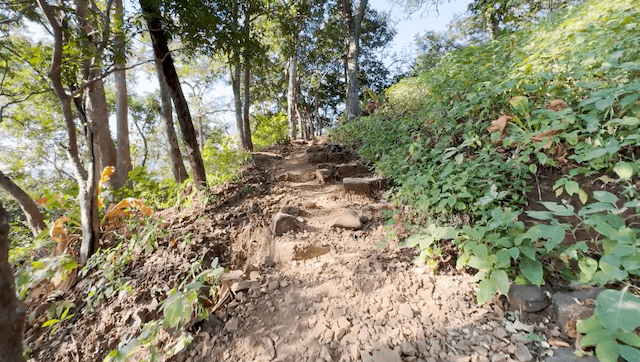
The initial climb was relatively easy, but the gradient gradually increased. Within 30 minutes, we arrived at Koti Plateau, a flat patch of land offering stunning views of the surrounding forests. Known as a prime spot for stargazing, the plateau felt like a natural amphitheater with the sky as its dome. We paused here, soaking in the tranquility and snapping a few pictures.
From Koti Plateau, the trail led us through a sparse forest, with the landscape turning more rugged and arid. The climb became steeper as we approached Tadmachi Plateau. The sight of the fort’s tower, adorned with a fluttering orange flag, kept us motivated. The path to the ridge required us to navigate a steep crevice. This section, though challenging, was manageable with the help of sturdy footholds and handholds.
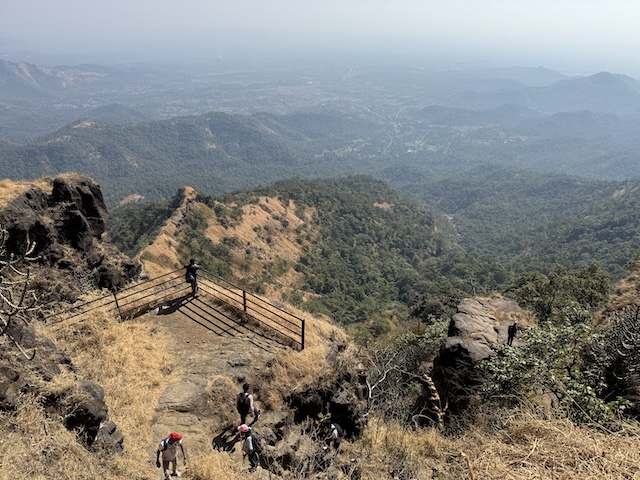
At the ridge, we were greeted by breathtaking views of the Sahyadri ranges. To our left, the path led to Ghodacha Mana, a narrow stretch resembling a horse’s neck. We took a brief detour here to enjoy the vantage point, which offered panoramic views of the valleys below.
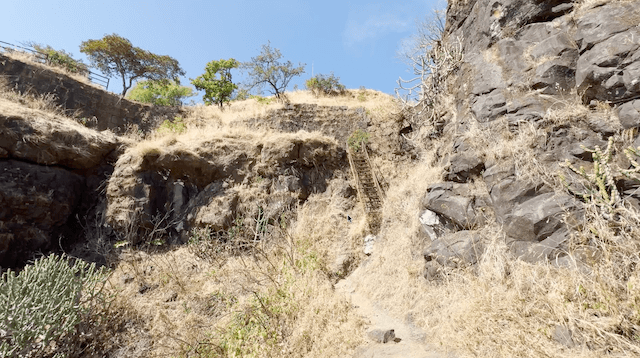
The final stretch to the fort’s base involved climbing an iron ladder fixed at a 70-degree angle. This was undoubtedly the most thrilling part of the trek. The ladder’s base was unsteady, held in place by a chain bolted to the fort’s dilapidated wall. Climbing it required balance and courage, as the rungs were slightly slanted, making us lean back while ascending. With one person holding the ladder steady at the bottom, we climbed one at a time, reaching the top safely.
Exploring the Fort
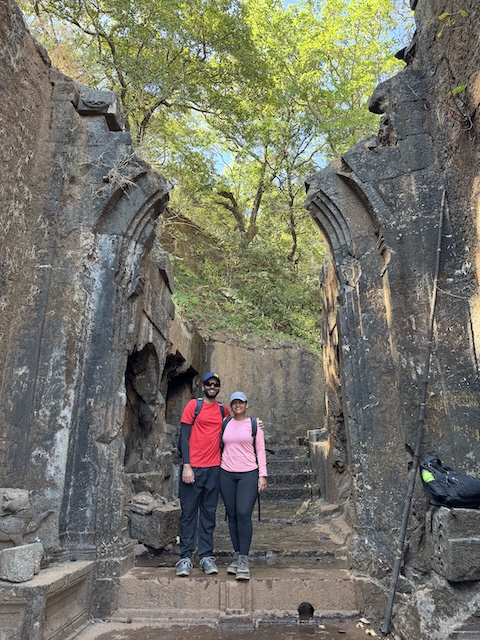
Once atop, we explored the fort’s ruins. A narrow path led us to a flat rock—a popular spot for photography. From there, a short walk brought us to a small water tank, though its contents were not potable. Continuing along the marked trail, we reached the Maha Darwaza, the grand gateway to the fort. The dome of this historic arch is now broken, but its structure still exudes a sense of grandeur.
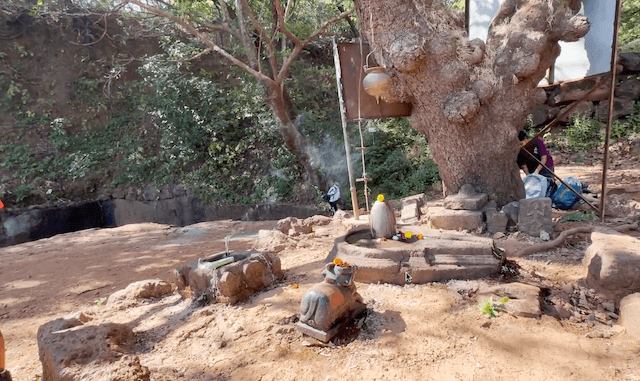
Under a large tree near the caves, we found a Shivling and idols of Lord Hanuman and Chhatrapati Shivaji Maharaj, alongside a Maratha flag. The caves, one of which is spacious enough to accommodate overnight trekkers, provided a glimpse into the fort’s historical use as a shelter. From the top, the fortification walls snaked around the mountain, offering stunning views of the surrounding peaks.

The Descent
After a brief rest and some snacks, we began our descent. While descending is generally faster, the loose rocks and steep patches required us to move with caution. A significant portion of the trail was exposed to the sun, and as the day progressed, the heat intensified, making the descent more tiring. However, as we entered the forested section, we took a short break, enjoying the shade and the cool breeze that provided some much-needed relief.
Upon reaching the base village, we headed straight to a nearby water source and washed our faces with the cool, refreshing water—a simple but rejuvenating experience. For lunch, we indulged in a traditionally prepared chicken thali, which was both hearty and delicious, perfectly capping off our trek.
Once done, we called our auto driver, who promptly picked us up from the village and dropped us back at Asangaon station. Exhausted but exhilarated, we boarded the train, carrying with us the memories of one of Maharashtra’s most rewarding treks.
Mahuli Fort Trek Route
Below is the detailed route for the Mahuli Fort Trek, available on Google Maps. This map offers a comprehensive digital representation of the entire trekking path, complete with geographical coordinates, elevation profiles, key waypoints, and detailed navigation for the journey.
Downloading the GPX or KML file ensures seamless navigation, even in areas without network coverage, providing a safe and hassle-free trekking experience. So gear up, embrace the adventure, and immerse yourself in the historical allure of Mahuli Fort! 🏞️
Download the Route for Offline Use
For those who prefer offline navigation, you can download the trek route as a KML/KMZ file and use it with GPS apps like Google Earth or other trekking-specific tools. Here’s how:
- Click the Google Map link.
- Go to the three-dot menu in the top-left corner of the map.
- Select Export to KML/KMZ.
- Save the file and upload it to your preferred GPS app.
Recommended Apps for Navigation
- Google Earth: Easily import the KML/KMZ file and view the route in 3D.
- Gaia GPS: Perfect for offline trekking with detailed topographical maps.
- AllTrails: Provides elevation profiles and tracks your progress in real-time.
Best Time to Visit Mahuli Fort Trek
The best time to trek to Mahuli Fort is during the monsoon season (June to September) when the surroundings come alive with lush greenery, and the waterfalls along the trail are in full flow, creating a breathtaking experience.
Winter (October to February) is another excellent time, offering clear skies, cool temperatures, and comfortable trekking conditions.
Caution:
During the monsoon, it can be risky to get too close to waterfalls or rivers due to strong currents and slippery rocks. Additionally, the trek may sometimes be closed during heavy rains for safety reasons. It is highly recommended to check the weather conditions and confirm the trail’s accessibility with local authorities before planning your trek.
Mahuli Fort Trek Food Contact – Vilas Thakre – +91 9309912730
How to Reach Mahuli Fort
By Local Train:
Take a local train from Mumbai to Asangaon. Once you arrive at Asangaon, you can hire an auto or taxi to reach Mahuli Village, which serves as the base for the trek to Mahuli Fort.
By Road:
Drive from Mumbai via NH3 (Mumbai-Nashik Highway) to Asangaon. From there, follow the local road to Mahuli Village. The drive is scenic and convenient for those traveling by car or bike.
How to Prepare for the Mahuli Fort Trek
- Physical Fitness:
The trek includes steep and rocky climbs, so a moderate level of fitness is essential. Consider doing regular cardio or leg-strengthening exercises in the weeks leading up to the trek. - Hydration:
Ensure you carry at least 2 liters of water per person to stay hydrated throughout the trek. A few energy drinks or ORS packets can also be helpful to replenish electrolytes. - Snacks:
Pack some light snacks like energy bars, nuts, dry fruits, or sandwiches. These will help maintain your energy levels during the trek, especially on the steeper sections. - GPX Map:
While the trail is generally well-marked, downloading a GPX map on your phone adds an extra layer of safety and helps avoid any confusion, especially if you’re trekking solo or during off-peak hours.
Things to Carry for the Mahuli Trek
- Water:
Carry at least 2 liters of water per person to stay hydrated throughout the trek. - Snacks:
Pack light snacks like energy bars, nuts, dry fruits, or sandwiches to keep your energy levels up. - Trekking Shoes:
Wear sturdy, non-slip trekking shoes with good grip, as the trail can be steep and slippery, especially during the monsoon. - Rain Gear:
If trekking during the monsoon, carry a lightweight raincoat or poncho to stay dry. - First Aid Kit:
Include essentials like band-aids, antiseptic cream, pain relievers, and any personal medications. - Clothing:
Wear lightweight, breathable clothes, and carry an extra set in case you get wet. - Backpack:
Use a comfortable, weather-resistant backpack to carry your belongings. - Mobile and Power Bank:
Ensure your phone is fully charged, and carry a power bank for emergencies. - GPX Map or Offline Trail Map:
Download a GPX map or keep an offline trail map to stay on track. - Camera:
Bring a camera or smartphone to capture the stunning views and lush landscapes. - Insect Repellent:
Protect yourself from mosquitoes and other insects, especially during the monsoon. - ID Proof:
Carry a valid photo ID, as it may be required at the base village or for emergency purposes. - Optional: Trekking poles for added stability and a small garbage bag to carry back any waste, leaving the trail clean.